Wednesday, December 5, 2018

Framing the First Floor and Roof

  So our next step was to frame the first floor. This is one of those jobs that doesn't get done by us.


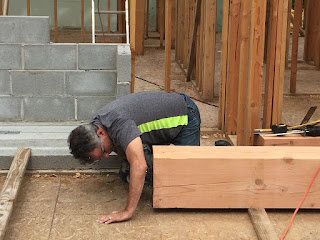
While the framing was getting done, we were able to work on some other projects. We needed to prepare the posts and beams to be installed in the dining room and main entrance. We had to sand, condition, stain and seal them. But first we had to pick the right color. So we stained a few scrap pieces to see what color looked best.


After deciding on a color, we got to work. The first step was to sand the beams.


 Now, each post weighs about 400 pounds, so a couple of us would stain one side, then call people in to help flip it.


We got a price of $55,000 to do all of the post and beam work, which is why we decided to do it ourselves. This is called timber framing. We bought the beams from a local saw mill. We bought chisels, Japanese saws, mallets and 3000 grit sharpening stones. We had to piece together all of the beams that run across the ceiling with the posts. When they didn't fit perfectly, Dan would chisel them down a bit here and there, until they were perfect. We fit them together using a mortise and tenon type of joint. In the end, it cost us close to $19,000 to do this ourselves.


 Maria was in charge of keeping the chisels sharp. She literally spent days sharpening them on the sharpening stones.


Then the framers began to install them.


The first floor was really starting to come together.


Saturday, October 27, 2018

Building the First Floor

BUILDING THE FIRST FLOOR


     So now the next step was to build the walls of the first floor.
This was done in the same way as the basement walls. We used the
ICF blocks and put them together like Legos, one block at a time.
This time it went much quicker  for us. Probably because we had a little
experience after doing the basement walls.


It wasn't long before the first floor walls were complete.
There are a lot of windows on the first floor, so we had less wall to build.

After those walls were done, we had to put the strapping back on,
just like we did on the basement walls. These add extra support for
when the concrete is poured into the walls. And we used the same pieces of wood as we used in the basement. When we took them off the basement walls, we stacked them in the back yard to be used again.


Next we had to frame out the windows and doors.


It was really starting to look like a house now.

Now we had to get the walls completely ready for the concrete pour.
After the strapping was done all around the house, we had to
set up the same alignment system as in the basement.
The younger kids carried all of the poles into the house while the
older kids and adults started to install them and the scaffolding system, as well. 
Then we were ready for the pouring of the concrete into the walls.
After 5 truckloads of concrete, we were finished. 


Friday, June 22, 2018

Framing the Basement and Back Filling

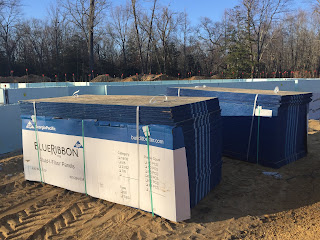
   After allowing the basement floor to completely dry, or cure, the framers could come in and frame out the basement. But first, all of the lumber was delivered.


The next step was for Dan and a few of the kids to frame out the base of the fireplace.  


Then the base of the fireplace was built, one cinder block at a time.


After a few days, the fireplace reached the first floor.


While the fireplace was being built, we back filled around the foundation.


While these jobs were being done, Maria got to clean out the shipping container.
We keep all of our tools in there and it gets messy and unorganized quickly.


At this point, the framers came in to frame out the different rooms in the basement.


                          And then one day, we had a floor to our house.


Wednesday, May 16, 2018

Pouring the Basement Walls and Floor


     After all of the prep work was done, it was finally the day to pour the basement walls. The first truck showed up and the pour began.
The concrete truck hooks up to the pump truck and pumps the concrete into the walls. There are a couple of guys who guide the arm all around the walls.
Then there are a few guys on the ground in the basement making sure the walls
get completely filled.  There was only 1 major blowout, which means the wall broke open and the concrete came pouring out.

But we patched that up quickly and finished the rest of the walls without any issues. As the walls were being filled, Dan had to go around and make sure they were all plumb. 
If they weren't, Daniel would tighten, or loosen, the turnbuckle supporting the wall. By the end of the day, we had solid and level basement walls.
The day after the walls were poured, it snowed 4 inches. So we had to wait until
it all melted before we could get back in there to work. Once the snow was melted, we removed the strapping and stacked it neatly in the backyard to be used for the 1st floor. Then we removed all of the scaffolding and bracing system
and saved that for the 1st floor, also.
The next step was to apply the waterproofing all around the outside perimeter of the house. These are like giant pieces of very sticky tape. They will help keep any moisture out of the basement in the future. 

We almost finished this task when we got another 8 inches of snow on the first day of spring. This winter has been 
crazy, we are hoping spring weather comes soon. But while we were waiting for the snow to melt so we could get back to work, we hit the slopes!
After all of the snow melted, we started to prep the basement floor for concrete.
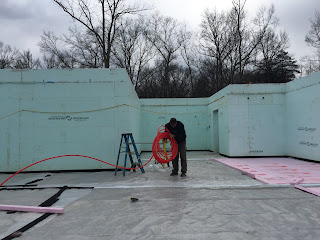
We covered the floor with sheets of plastic to keep moisture out. Then we laid
down sheets of foam and the pipes for the heated floor in Dans workshop. 
Then the concrete guys came and poured the floor.
Finally, the basement pour was finished.